So here is the tutorial - good luck with making your quilt bags.
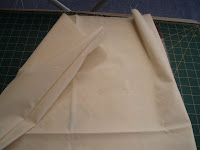
 Cut a piece of fabric 46 inch long x 26 inch wide (I usually fold in half as per this picture) Also cut a piece 46inch long x 3.5 wide for the handles.
Cut a square piece about 12 x 12 inch for pocket

These are my labels which will go on the pocket - you don't have to do this - perhaps screen print etc.

Stitch the label onto the pocket - just a bit off centre towards the bottom.

Fold double edge and stitch at the top edge of the pocket.

then stitch the pocket to the main piece of fabric

With wrong sides together - stitch a 1/4 inch seam down each long side of the main bag piece.

Do both sides

turn your bag inside out

And iron the seams flat

You will then need to stitch just over a 1/4 inch down each long side of the bag again - this creates a french seam. (no raw edges showing)

While the bag is turned inside out - iron a double edge fold at the top of the bag - stitch this down.

I usually end up with around a 1 inch lip on the top of the bag.

This next bit is a little tricky - at the bottom of the bag - fold each pointed corner out to create a triangle shape - as below. I make sure the seam of the side of the bag is aligned with the middle crease at the bottom of the bag- this will make the bottom of the bag square and sit nice.


Measure about 3 inches in from the corner and stitch right across the corner.

Do this to both sides and your bag should look like this...

Turn the bag right side out and your corners will look like this....

This is looking inside the bag. See how the corner bits fold in. (I have no idea what the technical sewing term for this would be - I just know how to do it.

The outside of your bag should now look like this...

For the handles. iron the long side of the 3.5inch piece of fabric - usually just under an inch fold.

On the opposide side - fold about a 1/4 inch or thereabouts

Fold the side with the small fold over the top of the large fold

Sew down the centre line to secure the two edges.

Fold this long strip in half exactly and cut into two pieces - you now have two handles for your bag.

Okay - blogger put the pictures around the wrong way from here so I will work backwards.
this is pinning the straps to the inside of the bag - I usually align them so the handles sit just outside the line of the pocket on the front.


The handle strap should be right side facing you in the next two pictures. If you have trouble with the handles of the bag - just have a look at one of the enviro bags or calico bags you may have. this is all I based my bag on - just made it big enough to fit a finished large quilt inside.


This is the finished bag - sideways even!


3 comments:
Great bag tutorial! and beautiful drawings :)!!
Yo Jano, tried to ring you yesterday but the phone was busy..hope your chrissy is very relaxing for you and yours and your triangle quilt keeps you lovely and warm..the calico bags are great mate, and when you have 18 months delay with your quilting they will look terrific on your shelves..lol..thanks for the tutorial..take care buddy.Pat xx
Nice bag. Thanks for sharing!
Post a Comment